Homes with crawl spaces often suffer from high humidity, cold floors, and pest problems that can affect the quality of life at home and the resale value of your property. Encapsulating your crawl space can effectively resolve these issues, and this guide on encapsulating a crawl space will show you how. Here are the five steps to encapsulate your crawl space and keep your home healthy.
Step #1: Crawl Space Preparation
Because of its unique layout, crawl spaces in older homes tend to have a lot of wasted space. So before encapsulating a crawlspace, you’ll need to remove all of that clutter. This includes old couches, unused patio furniture, newspapers, and boxes—and get rid of it. If you’re in a warm area, spray down your crawl space walls with an insecticide (the bugs will be dead by encapsulation time) and wipe them down with water to ensure they are clean and ready for insulation installation.
Step #2: Walls
If you have a crawl space that is typically higher than floor level, or if you are doing a partial encapsulation with adjustable foundation walls, build those walls out to where they will sit once you’ve completed encapsulation. The six-inch overlap between wall liner and ground cover (more on the ground cover below) will be necessary for an effective vapor barrier.
Step #3: Pipes and Penetrations
The space beneath your house will be an adequate location for a vapor barrier. So, take time to evaluate where a vapor barrier will be most beneficial as you move around your crawl space. As long as there is a continuous sheet of polyethylene beneath all framing members within 4-6 inches of any surface, it will act as an effective vapor barrier. Next, wrap ductwork or pipes with insulation or seal them with spray foam insulation in lieu of using a moisture control layer.
Step #4: Columns
This is where you’ll begin applying your vapor barrier. To make it easier, we recommend starting in one corner with a perfectly-cut piece of vapor barrier that covers exactly one square (carpet) tile. Stick down your tape first and then lay your liner over it, pressing down firmly as you go. Make sure you check every single piece of vapor barrier as you work – tape can get stuck on itself if not removed carefully.
Install a termination bar every 16 inches, following your vapor barrier manufacturer’s recommendations for tape and sealing around penetrations. Follow with two staples on each side of each bar, making sure they line up with your seams. Finally, run a bead of construction adhesive along both sides of each termination bar (install any necessary electrical boxes).
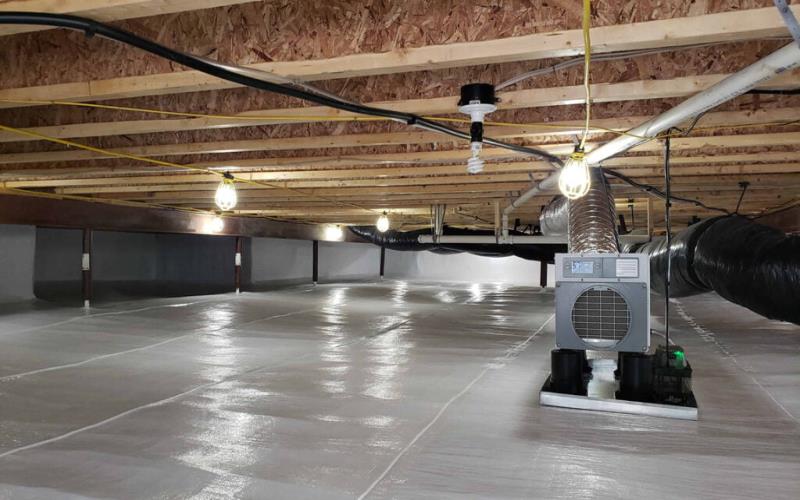
Step #5: Plastic Roll Out
Because you have now covered 100% of your crawl space with a vapor barrier, it is time to begin rolling out your plastic. Get yourself on a ladder and start rolling from one end of your crawl space to another. Start at one wall and unroll sections of plastic towards another wall. As you get close to that other wall, simply tape down all seams with seaming tape.
With a little bit of planning and know-how, encapsulating your crawl space can be an easy process that leaves you with a more comfortable home. Ensure you wear protective gear and follow all safety guidelines during all phases of encapsulation. You can also get professional assistance from trusted places like 58 Foundations to get it done flawlessly.

